The Next Generation of Innovation
A trusted name, all new features:
More than just a facelift: This flagship family of CMMs from ZEISS has undergone a thorough overhaul. Numerous upgrades are combined to boost safety, sustainability, flexibility, ergonomics and of course productivity on a new level.
Enter a New Era of Precision
Discover the ZEISS PRISMO Family
The ZEISS PRISMO portfolio comprises four models that are fully compatible with requirements and boost efficiency through quality and accuracy. They represent the ideal solution for customers who cannot accept any compromise on precision in the context of quality control. With ZEISS PRISMO, accuracy plus safety equals productivity.
ZEISS PRISMO -
The all-rounder

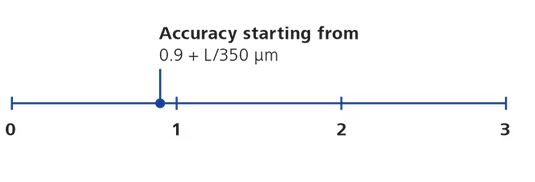
Featuring a measurement accuracy of 0.9 + 0.9 + L/350μm, ZEISS PRISMO is the flagship ZEISS CMM and synonymous with precision measurement. Computer-Aided Accuracy (CAA) corrects all dynamic influences on the machine to optimize precision even during high-speed scanning. Equipped as standard with the ZEISS VAST performance package, the ZEISS multi application sensor system (ZEISS mass technology), and the new ZEISS C99m controller, ZEISS PRISMO delivers a maximum productivity and outstanding performance.
Best Results Guaranteed
Computer-Aided Accuracy (CAA) corrects all dynamic influences on the machine in order to optimize precision for high-speed scanning. It promotes economic efficiency with faster calibration and longer operating times.
Highest Productivity Guaranteed
The ZEISS VAST performance package ensures maximum productivity by shortening the travel path. FlyScan reduces measuring time by as much as 70%, while QuickChange performs automatic stylus changes up to 60% faster.
Maximum Application Flexibility
ZEISS PRISMO is equipped with the ZEISS multi application sensor system (ZEISS mass technology) as standard. Thanks to the new C99m controller from ZEISS and new cabling, the roughness sensor ZEISS ROTOS and the optical sensor ZEISS LineScan can now be used on the same machine.
Time and Cost Savings
In addition to reducing the number of stylus configurations and system changes, the ZEISS Articulating Stylus measures in all orientations with styli up to 200 mm long. Every angle position between +135° and -135° is freely selectable after calibration.
ZEISS PRISMO fortis -
Close to Production

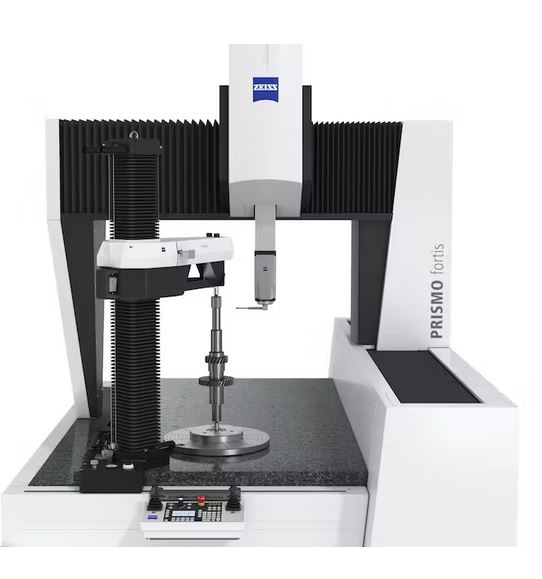
Thanks to optimized air bearing integration, floating ZERODUR® scales, and thermal bending corrections, ZEISS PRISMO fortis guarantees maximum precision at temperatures up to 40°C.For this reason, ZEISS PRISMO fortis can be deployed in a production area without any additional investment in a temperature-controlled measuring enclosure. It is also uniquely compatible with the ZEISS VAST Rotary Table (ZVR) option, which enables faster rotary table movement for faster measurement times.
Maximum Temperature Gradient
The thermal bending correction featuring additional temperature sensors in the granite plate, the anti-vibration pneumatic damping system, and floating ZERODUR® scales with 80 nm resolution ensure accuracy and guaranteed temperature stability up to 40°C.
Guaranteed High Precision Outside Quality Lab
Consistent refinement of the individual components means ZEISS PRISMO fortis is ready for integration in production. As it does not require an air-conditioned measuring room, this saves on substantial investment costs. The CMM can also be deployed in a quality lab if desired.
Driving Automation Forward
Performing quality inspection at the production line saves time on component transport. The optional U-shaped granite ensures loss- free use of the measuring volume (PRISMO 12/18/10 fortis only), even with an automated loading system. This cuts costs while boosting efficiency and reproducibility.
Compatible with ZEISS VAST Rotary Table (ZVR)
ZEISS PRISMO 7/12/7 fortis is uniquely compatible with ZVR, which enables faster movement of the rotary table for faster measurement times. The benefit of higher rotation speed is multiplied as workpieces are measured on different levels.
ZEISS PRISMO verity
The New Standard

ZEISS PRISMO verity delivers results with an accuracy of .7 + L/400μm through the use of ZERODUR® scales and advanced CAA correction. As it meets the VDI/VDE 2627 requirements for class 3 measuring rooms, all necessary measurements can be conducted in an air-conditioned chamber set to 19-22°C. With improved form measurement values, ZEISS PRISMO verity is the best machine in its class.
Best-in-class Accuracy
Improved form measurement values mean ZEISS PRISMO verity is the best machine in its class. Guaranteed to provide the highest precision, it combines with ZEISS VAST navigator technology to automatically configure the maximum measuring speed.
Suitable for Class 3 Measuring Rooms
Thanks to its high accuracy, it meets the requirements for class 3 measuring rooms according to the VDI/VDE 2627 standard. As a result, all necessary measurements can be conducted in an air-conditioned chamber set to 19-22°C.
Top Price-Performance Ratio
Boasting a number of enhancements drawn from ZEISS PRISMO ultra – including CAA corrections, ZERODUR® scales, and improved working instructions – ZEISS PRISMO verity delivers optimum results where maximum precision matters most.
High-resolution ZERODUR ® scales
With 80 nm resolution and a CTE of nearly zero, these floating scales promote accuracy while eliminating the impact of torsion and temperature variations. They remove the need for temperature sensors and require no temperature correction themselves.
ZEISS PRISMO ultra
Highest Precision

With a length measurement accuracy of 0.5 + L/500μm, ZEISS PRISMO ultra further increases the precision of the ZEISS PRISMO. This is achieved with more precise scales, a modified air bearing connection, additional CAA corrections, air damping, and stricter matching of all machine parts. ZEISS PRISMO ultra is ideal for tasks where maximum precision is required, such as in research, development, quality assurance, and the calibration of guages or test specimens.
Top Accuracy and Reproducibility
ZEISS PRISMO ultra boasts numerous next-level features including thermal bending compensation, an active pneumatic damping system, improved air bearings, and ZERODUR ® scales with 20 nm resolution. These ensure remarkable precision and stability.
Form Measurement with Guaranteed Quality
The optional form measurement package including the RT-AB select guarantees the calibrated value of a ring gauge within 0.2 μm or better – as confirmed by a highly respected German institute. Following the golden rule, the measurement tolerances like roundness and cylinder form are guaranteed from 2-3 μm.
Excellent Results Guaranteed
Enhanced CAA methods such as bending of the calibration sphere, improved tensor calibration, and dedicated CAA corrections for RT measurements guarantee maximum precision even at high speeds and promote outstanding CMM stability by combating influencing factors.
Individualized Installation and Acceptance
Each ZEISS PRISMO ultra granite plate undergoes a 3-month acclimatization prior to delivery. Final acceptance takes place in a dedicated climate-controlled chamber for perfect adjustment. A precision test is performed after installation and an expert acceptance test follows 4-6 weeks later.
Always on Point
ZEISS CMM Acceleration Mode for Aerospace Application
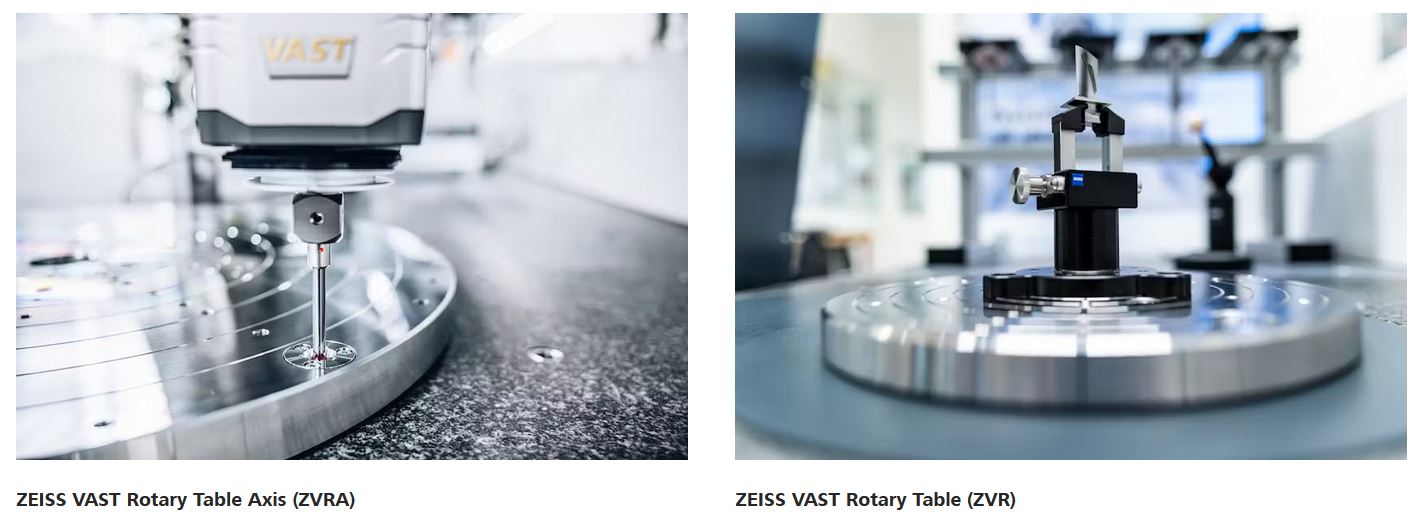
Quality inspection of engine components like blades and blisks is vital. Yet it is also expensive and time-consuming, accounting for 20% of the total production cost and 25% of the total production time. Any means of speeding up the measurement process without compromising on accuracy promises significant savings for the sector at large – which is where ZEISS CMM Acceleration Mode for Aerospace Applications comes in. Available for ZEISS PRISMO 7/12/7 fortis, ZEISS CMM Acceleration Mode for Aerospace Applications comprises a pair of options known as ZEISS VAST Rotary Table Axis (ZVRA) and ZEISS VAST Rotary Table (ZVR) as well as a dedicated application support package if required. ZVRA boosts accuracy by providing swift definition of the axis of the rotary table, while ZVR promotes faster movement of the rotary table and thus faster measurement.

ZEISS TS
The New Tailstock for the ZEISS PRISMO Family
The tailstock from ZEISS makes it possible to clamp shaft-like measurement objects between centers. For example, gear shafts, worm shafts, crankshafts, camshafts, and rotors can be clamped without deformation and measured in the best possible way. Thanks to this ideal accessibility, complete measurements can be realized in a single clamping position. ZEISS TS shows its strengths through an interchangeable interface that enables swift setup of the tailstock in the measuring volume if required. In combination with the high-precision air-bearing rotary table ZEISS RT-AB-600, a universal coordinate measuring machine can therefore be quickly and flexibly expanded into a specialized shaft measuring machine. Available in two Z-sizes as the TS-7 and TS-10 variants, the ZEISS TS is perfectly aligned with all members of the ZEISS PRISMO Family.

Maximum Speed and Agility for the ZEISS PRISMO Family
Performance Accelerators
The ZEISS PRISMO Family combines speed, flexibility, and productivity at a higher level than ever before and is the future of performance. In combination with technologies such as ZEISS VAST navigator, ZEISS CALYPSO VAST probing, ZEISS CALYPSO pallet optimizer and ZEISS VAST Rotary Table Axis (ZVRA), effiency can be increased enormously and measurement time reduced.
ZEISS VAST Navigator
Automatically configures the optimum scanning speed to reduce user error. Promotes increased scanning speed, consistent accuracy, and reliable and repeatable results.
ZEISS CALYPSO VAST Probing
Significantly reduces the time spent on single-point measurement while ensuring adequate accuracy. Measurement can be performed up to 25 % faster.
ZEISS CALYPSO Pallet Optimizer
Changes the measurement strategy from probe-by-probe to feature-by-feature – for an entire pallet at once. This significantly shortens the measuring time, reduces the need for styli changes, slashes costs, and boosts efficiency.
ZEISS VAST Rotary Table Axis (ZVRA)
Defines the axis of the rotary table for accurate and reliable measurement. Where axis definition previously involved 6 single-point measurements, ZVRA performs one continuous movement in a fraction of the time.
|


